Я собирался опубликовать это некоторое время, но потратил так много времени, играя, что у меня не было времени опубликовать.

Okay, I lied--I've just been to lazy. Anyhow, I know that noise from the GS Mini's ES-GO has been a recurring topic here, and although I've shared some of my experiences with this, I actually did take pics of the installation process.
I want to recap my story here (although you can search the threads as well). I got my GS Mini this summer, and love it. I had persistent problems with what seemed to be ground noise, but strangely, the problem followed the guitar to every place that I went. I concluded that the ES-GO perhaps had some shielding problems, as touching the grounded barrel of my instrument cable caused the noise to diminish. As a Telecaster fan, I know very well that shielding cavities (not really convenient in an acoustic!) and grounding strings (via the bridge in most electrics) will usually knock out the noise, even if it's not the best solution.
Before I pulled out my roll of foil duct tape and soldering iron, I thought that I ask Taylor service about it. I spoke with Bob (probably not *that* Bob), and had a great conversation about my suspicions. At the time, he told me that they were aware that this had been an issue for some people, and that they were working on a solution. When I called back in a few weeks (as asked to), Bob took my address and sent me a grounding kit, free of charge. Since installing this kit, my Mini has been DEAD silent. It's a very easy fix, and I hope that providing some details might help others hang on to what I think is a very usable pickup. I know that K&K minis get a lot of love on this forum, but for those who want something easy to install on their own, the ES-GO might make more sense.
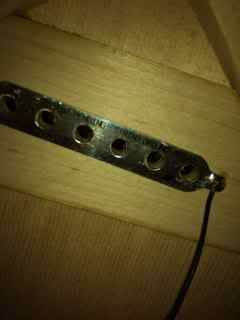
The grounding kit consists of a small metal plate that attaches underneath the bridge using (pre attached) double-sided tape. It has an attached wire that leads to a small fuse block, which is intended to protect the player from shock hazards if there is an electrical problem. Most electrics don't have this, and while it can be argued that it's overkill, I am skeptical enough of the wiring in most venues to say that it should probably be standard equipment on all string-grounded guitars.
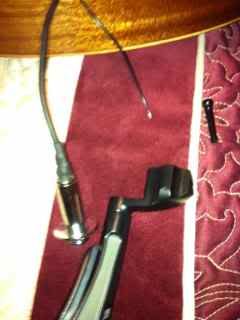
The fuse block then has another wire, which needs to be electrically bonded to a grounded part of the guitar--I recommend the outer shell of the output jack. While my original intention was to permanently solder this to the jack, my "temporary" taping has held up well enough that I've since left it undisturbed. More on that later.
Here's what I learned from installing mine:
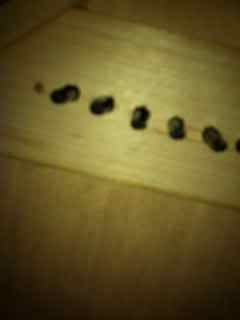
1. Remove the strings (capo them at the first fret if you don't want to replace them), and then replace the bridge pins. The idea of the string ground is to use the player as a ground, so that noise is reduced in the same way as when you touch the output jack. To do this, the player is bonded electrically to the strings (while touching them!), which are bonded to the metal plate by the ball ends of the strings, which then run to whatever point you attach the end of the last wire to. It's important, then, that the grounding plate be aligned over the holes that the pins ride in. Once you put the pins in, it is very easy to line up the holes in the grounding plate with the pins themselves--you put the plate "over" the pins from inside the guitar. See bridgeplate1.jpg and bridgeplate2.jpg for pics.

800) {this.width=800;this.alt='Click here to see a large version';}" onmouseover="if(this.alt) this.style.cursor='pointer';" onclick="if(this.alt) window.open('
http://i1202.photobucket.com/albums/bb373/boilerup2004/bridgeplate1.jpg');" border="0">

2. Предохранитель Блок поставляется с двумя липучками на липучке для крепления. Будьте внимательны, когда вы положите это, по двум причинам. Во-первых, если предохранитель перегорел, вы захотите извлечь его из звукового отверстия для замены. Во-вторых, если вы неаккуратны с этим, вам придется прислушиваться к проводу заземления внутри вашей гитары, когда вы перемещаете его - есть еще маленький клип для ES-GO, который может помочь вам с this.
3. непрерывность.jpg, чтобы показать, что пластина заземления образует электрический путь от моста до конца провода. Это хорошая идея, чтобы убедиться, что у вас есть непрерывность от струн до конца провода - я был обеспокоен, что у меня может не быть хорошей связи между концом струны и пластиной, но у меня все получилось хорошо.

4. Теперь вы должны положить конец провода куда-нибудь. Я использовал наконечник, но он не сработал так, как я надеялся. Мое первоначальное намерение состояло в том, чтобы вставить маленький глазной соединитель между корпусом гитары и плечом наконечника, возможно, пропустив один из крепежных винтов через ушко. Там просто не хватало места - Taylor проделал большую работу по сохранению этого отверстия плотно, и я обмотал скотчем голый конец провода к внешней части концевого разъема. Это было прошлым летом, и у меня с этим еще не было проблем, так что все так и настроено. Припой, вероятно, был бы лучшим вариантом, но у меня есть ощущение, что мне никогда не понадобится идти по этому пути.


Я не знаю Не знаю, есть ли у других GSM больше места, чтобы пропустить заземляющий провод до винтов, но я не думаю, что для установки абсолютно необходимо использовать паяльник. Другими словами, если вы можете установить ES-GO, вы, вероятно, также можете установить комплект заземления.